Test Drive: The Portable Wargame


I’ve been wanting to take The Portable Wargame out for a spins for some time now, but just never could figure out what I wanted to do. What figures did I already have that would fit the bill, what playing surface did I have…

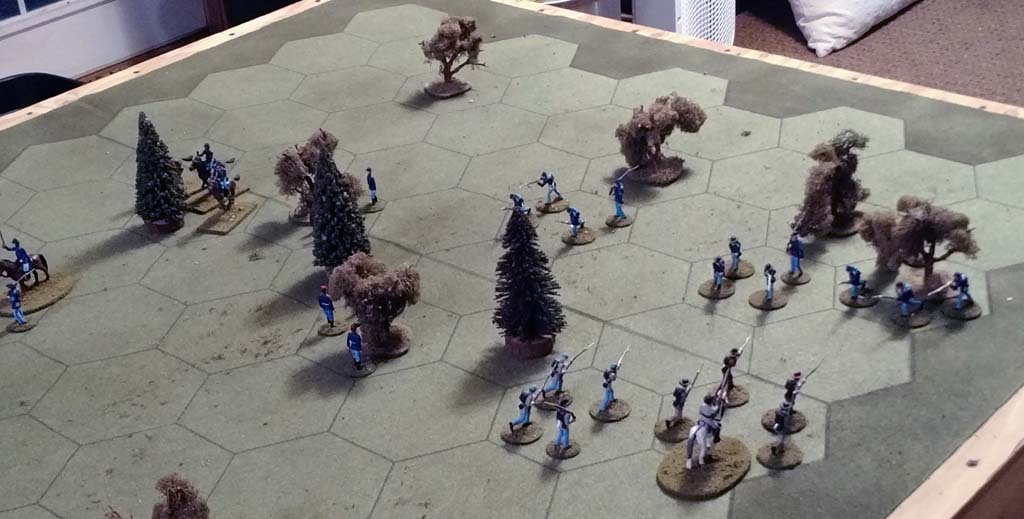
Suddenly it hit me; right in front of my nose, 40mm Scruby American Ciivil War and my Hotz Command Mat! Bonus in that they were already out and on the table. Hex grid runs wrong way, but that was easy enough to remedy (ignore).

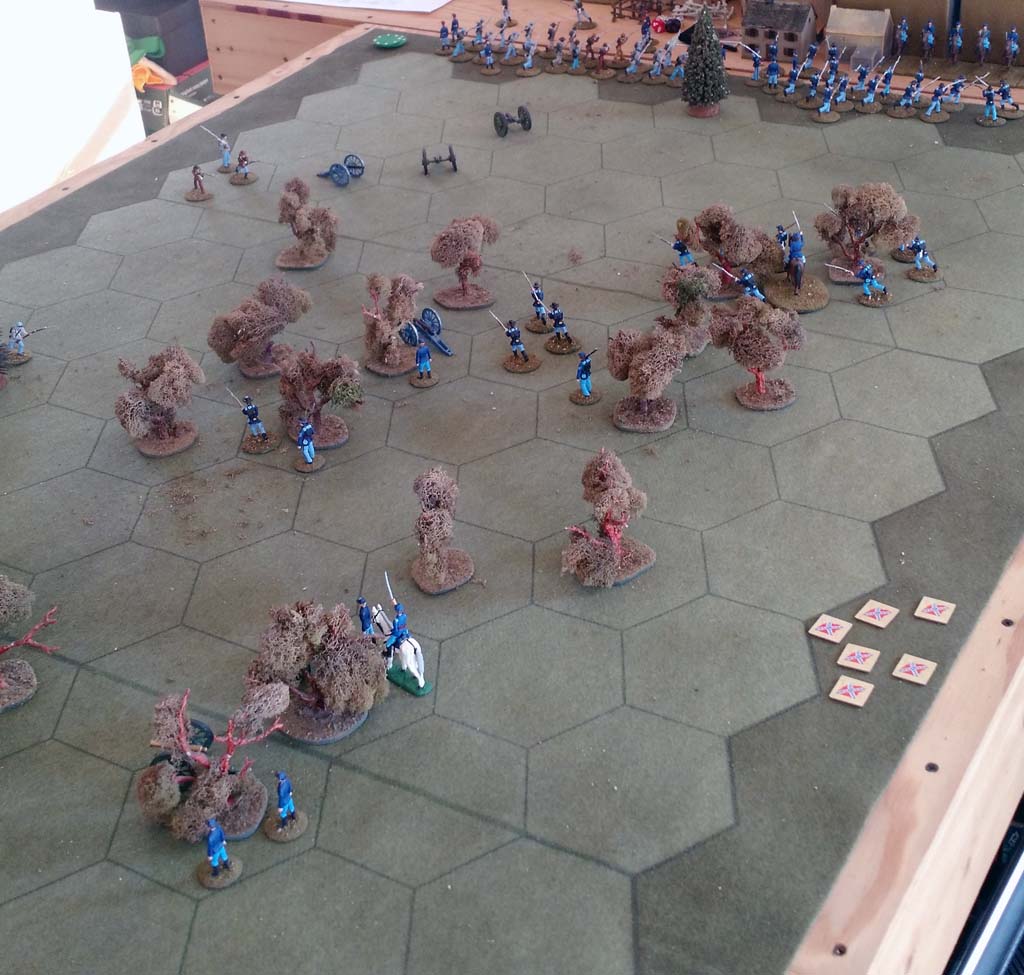
Nothing fancy for the scenario. Just went with balanced forces: 4 x Infantry, 1 x Cavalry, 1 x Artillery and a Commander for each side. For terrain went with a mirrored layout; clear and some wooded areas (grid was 9 x 8).

Game was played Solo, using Sudden Death rules; grid was 6″ hexagons.
PIPS, rather than cards for activation. I do think I’ll need to devise a simple activation system for solo games; the cards seem nice, but more hassle (matching card decks, etc.) that I want. PIPs were ‘ok’, but still think I need a better solution.
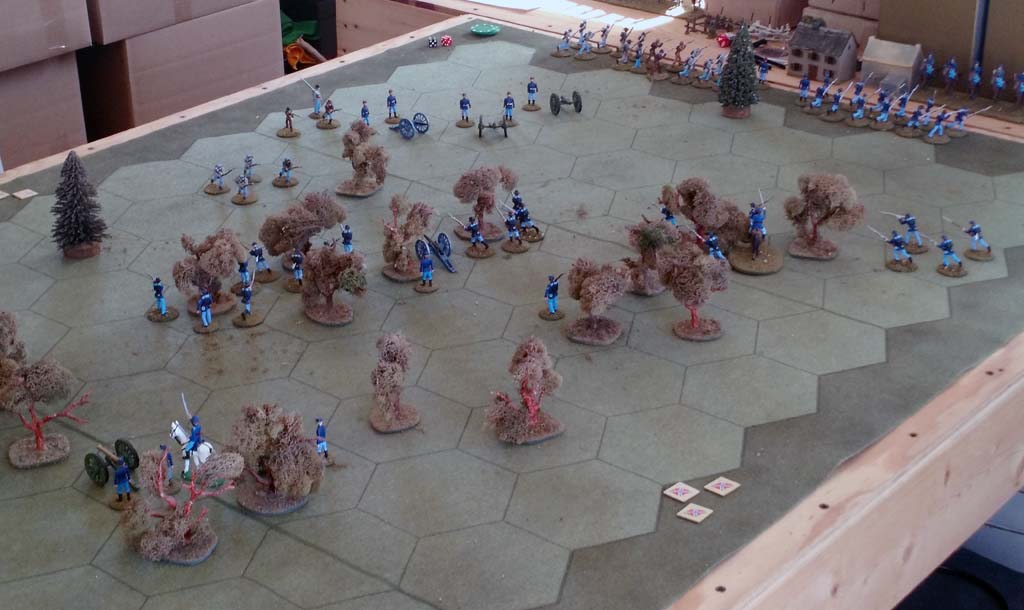
pre-game setup

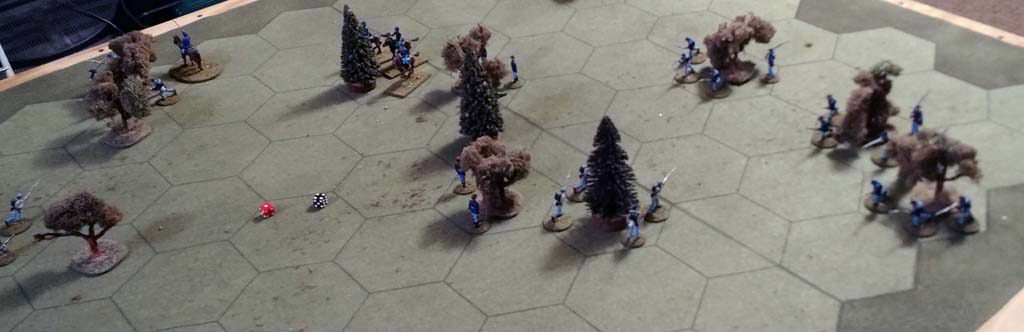
    • CSA wins Initiative and activates a single unit, Artillery moves up
    • USA activates 4 units; Artillery and Infantry move to forward positions
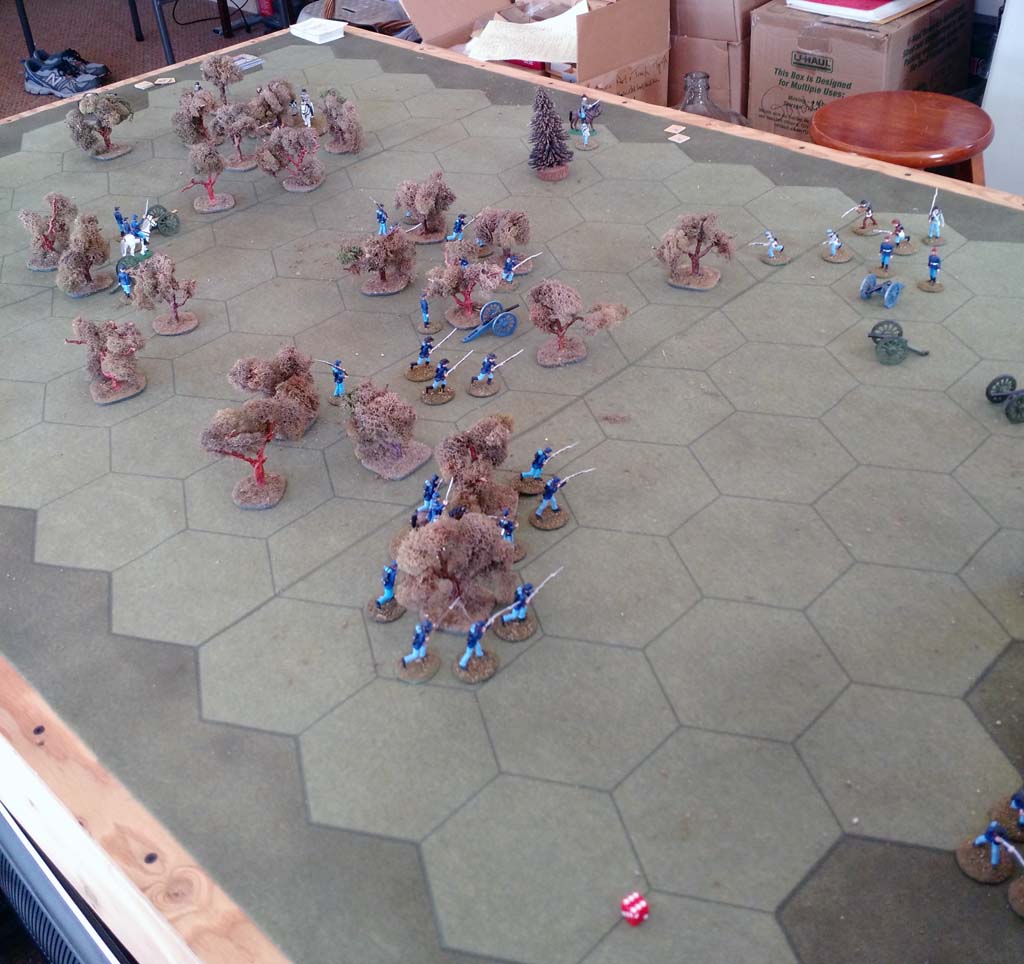
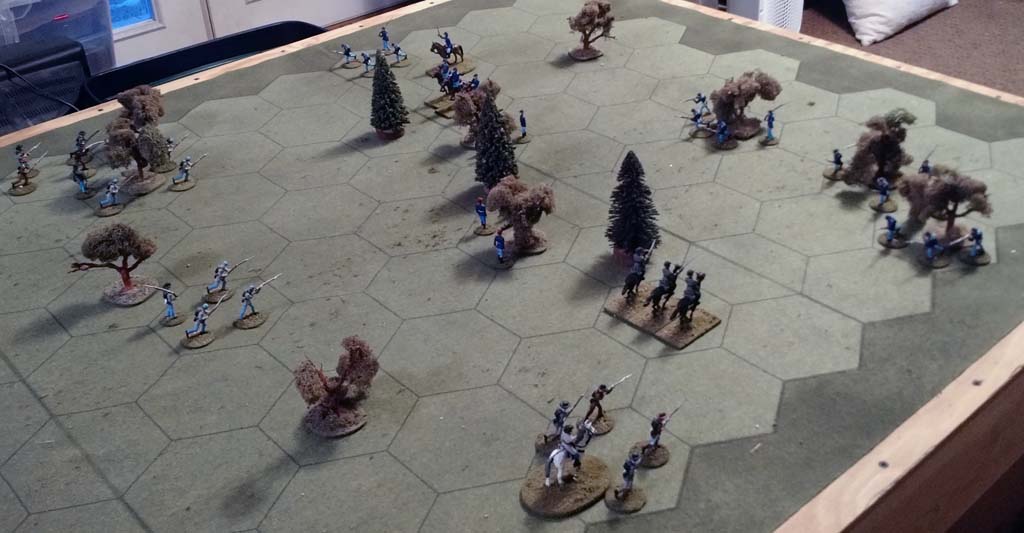
    • USA wins initiative and activates 4 units: Cavalry moves up and some more Infantry maneuvering.
    • CSA activates 5 units, with advances across the field

      end turn two

    • USA activates 4 units, maneuvering across the field
    • CSA activates 6 units. Advances and fires, but with no effect
    • USA activates 6 units. Attacks and Destroys the Rebel Cavalry and pushes CSA Infantry back on the left; further fire is ineffective
    • CSA activates 4 untis; Artillery fire has no effect

      end turn 4

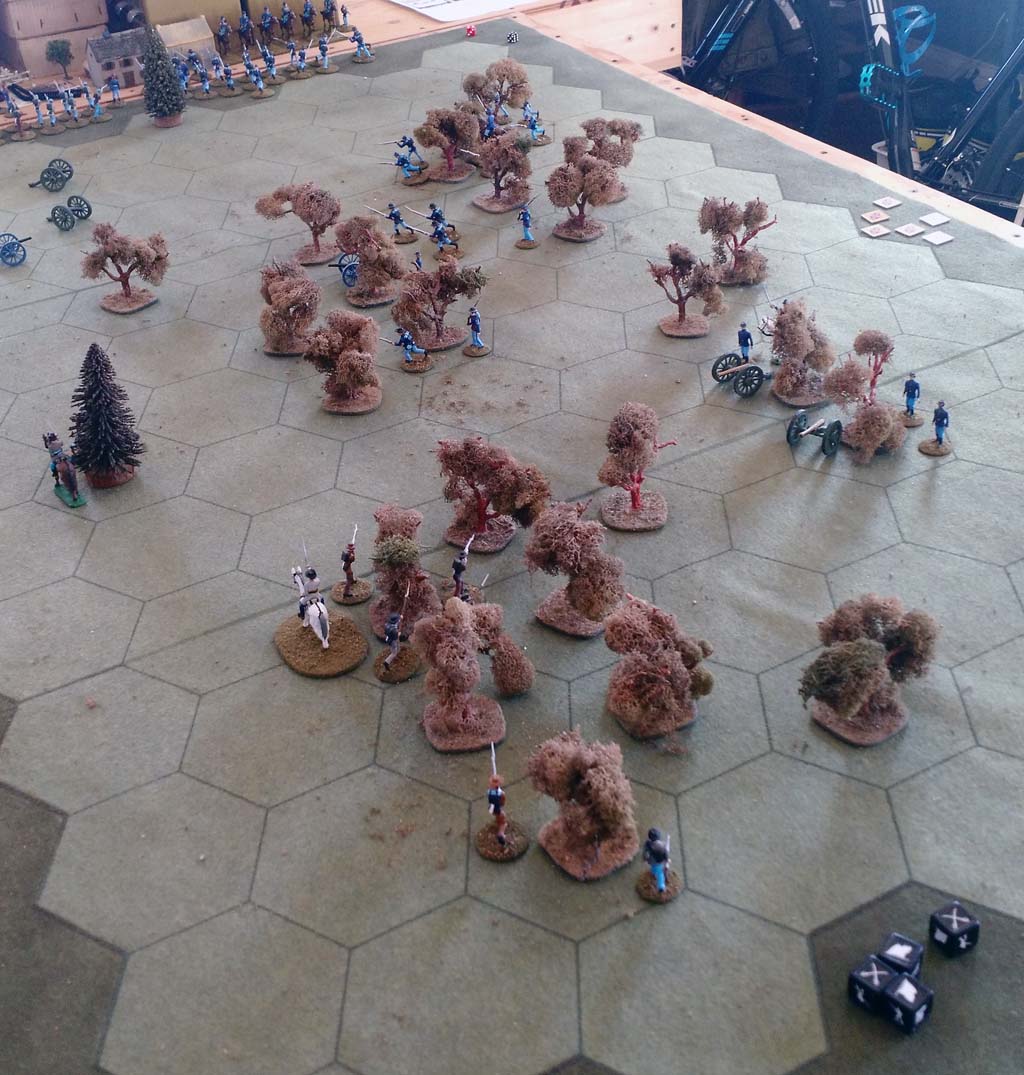
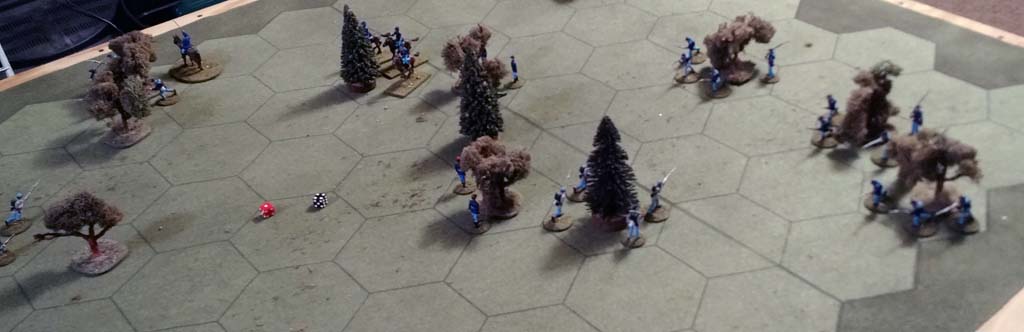
    • USA activates 4; combat results in the Destruction of Infantry unit & Rebel commander. Further fighting dislodges CSA infantry for position in woods on the Right
    • CSA activates 5; fighting pushes back USA on right, while CSA on left must retreat
    • CSA activates1. Close Combat results in the loss of another Rebel unit. CSA reaches Exhaustion Point! Given the state of remaining troops, this effectively ends the game…

      end of game

      Had this I not been using the Sudden Death rules, the game could have continued.

After some reflection, I think hex grid was a bad choice for ACW; I will need to make up a square grid board and try again. Initial impressions are that, as Bob suggests square grid prior to 1900 and hex grid 1900 and later. My next game will feature British vs. Zulu on a 3″ square grid; might be a week or two, as I need to make up a terrain board with the 3″ grid.

Overall I like the game, I can see many uses for quick games. Will be trying this again soon.

WAR-CHESS or The Game of Battle

For some time now, I’ve been wanting to read WAR-CHESS by Colonel Charles Richardson; thanks to Bob Cordery for the kick in the pants! His mention of this book in The Portable Wargame pushed me to look into the book a bit more.

War-Chess Cover

I am now in the process of reading the book, and will be trying out the game as well. This will be a slow read, as I try to fully grok the work and work out how the game might be played today. I expect that I will be posting a series of articles concerning this book and my efforts to play the game.

For an opening post, lets start with the beginning of the book, the first section is presented here as it gives a excellent overview of the coming games of battle…

Composition of the Game of Battle

The Game of Battle represents two antagonistic armies, one of which, the Attacking (or Invading) Army, is compose! of four figures, each representing a regiment of Light Infantry; five figures, each representing a regiment of Infantry of the Line; two figures, each representing a regiment of Cavalry; two figures, each representing a battery of Artillery; and one figure (a wagon), representing the ” Supply Train,”’ in which it is to be supposed is carried all of the subsistence, ordnance stores, etc., necessary for the maintenance and effectiveness of the army.

The object of the Attacking Army will be to capture the Citadel.

The other army, called the Defending Army, is composed of four figures, each representing a regiment of Light Infantry; five figures, each representing a regiment of Infantry of the Line; two figures, each representing a regiment of Cavalry; two figures, each representing a battery of Artillery; and one figure, the Citadel, representing a city in which are arms, ammunition, foundries, subsistence supplies, and all kinds of government property, which it is of vital importance to hold.

The object, therefore, of the Defending Army will be to secure the Citadel against capture.

Now that we have a picture of the opposing armies, we need to take a look at the battlefield.

The War-Chess Game Board:

War-Chess Game Board

And now, a bit of descriptive text, again directly from the book:

The board has one hundred and thirty nine (139) squares that can be occupied.

It represents a comparatively level field, traversed by a river impassable except at the fords and bridge.

In crossing the fords and bridge the figures move one, two, or three squares, according to their power, as elsewhere on the board. The short black lines indicate the entrances to the fords and bridge.

A figure cannot take, or check, another across the river, except at the fords and bridge.

In our next article we will look at: Rules of the Game of Battle


Join the discussion on Facebook; join our Facebook group and discuss this or any other war game or miniatures related topic
.

The Portable Wargame

Bob Cordery, 2017
102 pages

This book presents Bob’s rules for fast-play war-game rules; where battles are played out on a gridded table-top. The rules are designed for a small footprint game; not everyone has the space for a large table, free time to paint large numbers of miniature figures or room enough to store it all…

In the first 11 pages we learn a bit about how the game rules came about as well as some history of grid based wargames.

The next 16 page cover; some basic rules and description of grids, lines-of-sight, arcs-of-fire and so forth. All well presented, perhaps a bit too much detail for the experienced gamer, but very helpful (well illustrated) for anyone new to wargames.

Next on to units and how to represent them on the table-top. This section is five (5) pages long with some good photographs. Not too detailed for the old guard and instructive for the new gamer. The one thing I do find lacking is a selection of recommendations for beginning army composition. I realize that there are any possibilities here, but new gamers may have a hard time deciding what forces they may need. Perhaps an added appendix, in a future editor, could help address this.

Before moving into actual game rules, there is a short (four page) section covering Bob’s design notes. This is a nice addition; something of the design philosophy is always nice to have.

From there we proceed with rules for the late nineteenth century, including colonial, battles. This section is well organized and should serve a beginning warmer well. Following the rules is an illustrated (includes numerous photographs) battle report.

Next up are rules for an early to mid twentieth century wargame. Again, well organized and followed by another (equally illustrative) battle report.

Sample from battle report

A bit about game play; This is an IGOUGO sequence game. Units are assigned strength points and each side has an Exhaustion Point (1/3 total strength rounded up) when reached will cause the army to cease offensive action. Turns start with an Artillery Fire Phase, followed by alternating unit activations (each unit may: move, move & fire or initiate close combat). Artillery fire is simultaneous; roll a die, apply modifies to obtain results. Movement, as iis all distances measured by grid spaces. For Fire Combat, attacker rolls a die and applies modifiers to obtain results. In Close Combat both players roll a die, applying modifiers to determine the result. Special rules for various types of terrain and transport are provided.

The battle reports are good and they are useful; a bit too long (nearly 20 pages fro 19th century and about 15 pages for 20th century) for my taste, but very informative for the new wargamer. I would think the space could be better used for example army lists or the like; much like the Army Lists section in the book: When Empires Clash.

Thus ends the main portion of the book. The appendix presents Some thoughts on war-game design and this is followed by a short bibliography and footnotes section.

I have enjoyed reading this book, I purchased the paperback and ebook (Kindle) versions. The book is also available in a hardback edition. The book is well illustrated, drawings and photos. I found the photos appear best when viewing the Kindle edition, on a color screen (Kindle Fire or Desktop computer readers). The printed versions is best for players, since the charts & tables are more accessible (as to be expected, give the limits of ebook viewers).

I recommend this book to anyone intruded in small wargames or in grid based miniature wargames. I would say that is is a ‘must have’ for the war-game student.

You can purchase a copy from either:

Lulu: http://www.lulu.com/shop/bob-cordery/the-portable-wargame/paperback/product-23048800.html

or

Amazon: https://www.amazon.com/dp/1326904582/ref=cm_sw_r_fa_dp_t2_GI1KybVMDX5GG


Join the discussion on Facebook; join our Facebook group and discuss this or any other war game or miniatures related topic
.

When Empires Clash

Bob Cordery, 2014
72 pages

This book presents rules for fighting small battles between European Colonial armies and their opponents during the period 1875 and 1910.

Game uses a gridded field (squares or hexagons) and small armies (typically 12 units per side); a points system is provided to facilitate creation of balanced armies. All measurements are in grid spaces. With games lasting a maximum of 12 turns.

In the opening of the book we learn of the authors motives for this set of war-game rules: a small game, fitting in a small space with a need to support solo play. The next 15 pages cover standard definitions and provides various explanatory diagrams and illustrations.

The general rules, designed with 15mm figures in mind, are presented over the next 10 pages. Here subjects such as points value, terrain, army composition and dice are covered. These are followed by the battle rules; how to fight a battle. These battle rules are covered in 16 pages; complete with examples.

A bit on game play; all measurements, movement and range are by grid spaces – no rulers required. Units are activated one at a time, alternating players until all units on both sides have been activated. Combat is stand vs. stand. for fire combat both players roll, applying factors and compare scores; attackers score must be higher than defenders or combat is ineffective. Resolving close combat also requires both player to roll, again adding/subtracting factors. Attackers score must beat defenders score to be successful; attacker will recoil if not successful.

The last section of the book, Army Lists gives examples of various armies. This is perhaps one of the most valuable parts of the book; points values are fine, but seeing some actual army list examples really helps.

Experienced wargamers wanting to get right into the game will likely skip many parts of the book while the beginning gamer will want to read the entire book. This is a good book for anyone wanting a small Colonial themed wargame, well worth your time and money!

Available from Lulu: http://www.lulu.com/…/when-…/paperback/product-21958958.html


Join the discussion on Facebook; join our Facebook group and discuss this or any other war game or miniatures related topic
.

Battle Cry: Shiloh, Part Three

As it turns out, we were not able to finish the game until Sunday afternoon, after finishing farm chores and a wee bit of shop work; so without further delay here is the last part of this battle report…

Turn 13
  • CSA Skirmishing on Left results in USA unit elimination
  • USA Attack on Right scores hits on CSA Artillery
  • Each side has Lost 1 Unit
    • CSA Casualties @ 7
    • USA Casualties @ 9

Turn 14

  • CSA Probe in Center scores hit on USA Battery in woods
  • USA Force Marches Infantry in Center and Attacks causing 2 CSA casualties
Turn 15
  • CSA Skirmishing on Right Eliminates USA Infantry unit
  • USA Attacks in Center inflicting 9 casualties and Eliminating 2 CSA units
  • Loses so far:
    • CSA
      • 3 Eliminated units
      • 18 total Casualties
    • USA
      • 2 Eliminated units
      • 13 total Casualties

End of turn 15

Turn 16
  • CSA maneuvers in Center, entering the Hornets Nest
  • USA maintains pressure in Center; pushing back CSA Infantry and Eliminating CSA Artillery battery
Turn 17
  • CSA Rallies troops on Right
  • USA Skirmishing on Right Silences another Artillery battery
Turn 18
  • CSA Coordinated Attack; No Effect on Right, inflicting Minor casualties in Center with Artillery on Left dislodging USA Infantry from positions in the woods
  • USA Counter Attacks; inflicting casualties Left and Center
  • Loses so far:
    • CSA
      • 4 Eliminated units
      • 23 total casualties
    • USA
      • 2 Eliminated units
      • 15 total casualties

End of turn 18

Turn 19

  • CSA Generals take Aggressive Action! Action results in 4 USA casualties in the Center
  • USA massive Artillery Bombardment! Last of the CSA Artillery has been silenced; additional Infantry casualties inflicted in the Center
Turn 20
  • CSA Attack in Center Eliminates USA Infantry unit
  • USA Artillery in Center opens fire, Eliminating the 6th CSA unit! Game Over!
  • Loses at end of game:
    • CSA
      • 6 Eliminated units
      • 28 total casualties
    • USA
      • 3 Eliminated units
      • 20 total casualties
It seems to me like our games always last about 20 turns, with maybe 5 or 6 cards remaining before shuffle.
This game went the opposite of my expectations. I was sure the CSA would pull off a victory. However, around turn 16 the tables decisively turned in favor of the USA, who in turn had a run of good fortune and was able to continue to press the attack.
We shall see how round 2 comes out…
We usually play each scenario at least twice, typically looking for best 2 out of 3; switching side after the first game. For the third game, if needed, player eliminating the Most units (in the previous 2 games) chooses preferred side.
I’ve been toying with the idea of using Twitter to report on the next game. I’m pretty sure we can report on each turn in two (2) 140 character posts (one for each side). What do you think of the idea?